Centos7编译安装OpenResty
今天空闲,看到一篇文章,就突发奇想,想搞一下OpenResty
| 测试说明 | |
|---|---|
| 测试配置 | 8核4G |
| 测试系统 | Centos7.7-1908 |
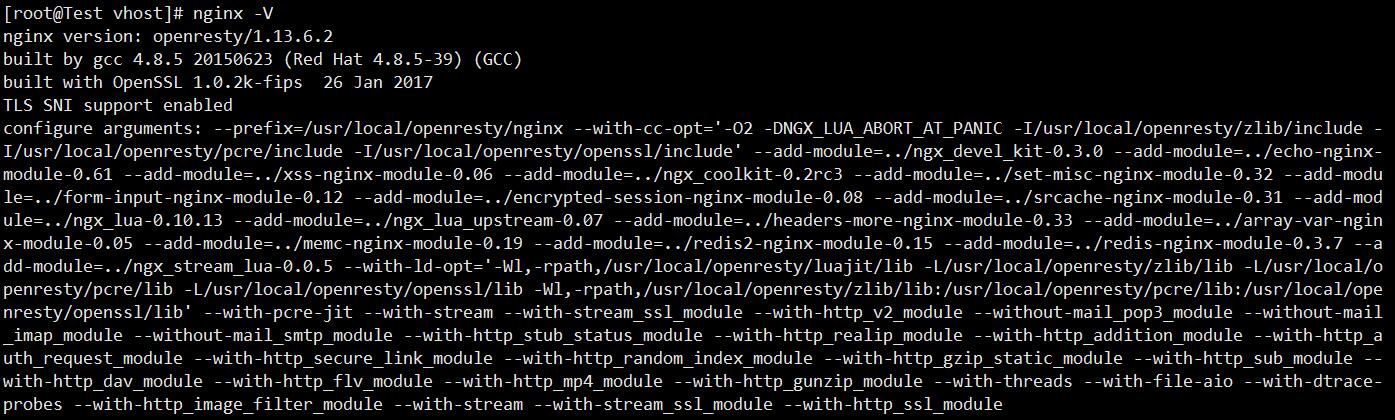
| 软件版本 | OpenResty-1.13.6.2 |
1.下载安装
- 1.1下载源码
这里我们下载OpenResty的源码包
wget https://openresty.org/download/openresty-1.13.6.2.tar.gz
- 1.2安装依赖
不安装依赖在编译的时候会出现很多报错
yum -y install gcc gcc-c++ pcre pcre-devel lua-devel systemtap-sdt-devel openssl-devel openssl
- 1.3编译前奏
需要注意编译并不能在openresty根目录进行,否则将会失败。
tar zxvf openresty-1.13.6.2.tar.gz
cd openresty-1.13.6.2/bundle/nginx-1.13.6/
- 1.4开始编译
这里编译的模块是我自己需要的模块,你可以根据你需要来编译所需的模块
./configure --prefix=/usr/local/openresty/nginx --with-cc-opt='-O2 -DNGX_LUA_ABORT_AT_PANIC -I/usr/local/openresty/zlib/include -I/usr/local/openresty/pcre/include -I/usr/local/openresty/openssl/include' --add-module=../ngx_devel_kit-0.3.0 --add-module=../echo-nginx-module-0.61 --add-module=../xss-nginx-module-0.06 --add-module=../ngx_coolkit-0.2rc3 --add-module=../set-misc-nginx-module-0.32 --add-module=../form-input-nginx-module-0.12 --add-module=../encrypted-session-nginx-module-0.08 --add-module=../srcache-nginx-module-0.31 --add-module=../ngx_lua-0.10.13 --add-module=../ngx_lua_upstream-0.07 --add-module=../headers-more-nginx-module-0.33 --add-module=../array-var-nginx-module-0.05 --add-module=../memc-nginx-module-0.19 --add-module=../redis2-nginx-module-0.15 --add-module=../redis-nginx-module-0.3.7 --add-module=../ngx_stream_lua-0.0.5 --with-ld-opt='-Wl,-rpath,/usr/local/openresty/luajit/lib -L/usr/local/openresty/zlib/lib -L/usr/local/openresty/pcre/lib -L/usr/local/openresty/openssl/lib -Wl,-rpath,/usr/local/openresty/zlib/lib:/usr/local/openresty/pcre/lib:/usr/local/openresty/openssl/lib' --with-pcre-jit --with-stream --with-stream_ssl_module --with-http_v2_module --without-mail_pop3_module --without-mail_imap_module --without-mail_smtp_module --with-http_stub_status_module --with-http_realip_module --with-http_addition_module --with-http_auth_request_module --with-http_secure_link_module --with-http_random_index_module --with-http_gzip_static_module --with-http_sub_module --with-http_dav_module --with-http_flv_module --with-http_mp4_module --with-http_gunzip_module --with-threads --with-file-aio --with-dtrace-probes --with-http_image_filter_module --with-stream --with-stream_ssl_module --with-http_ssl_module
- 1.5编译完成后安装
注意:make -j 8这里是根据我服务器的CPU核心来设置的,意思是使用8个核心进行安装,实际还是根据你自己服务器来安装
make -j 8
make install
- 1.6安装完成后操作
安装完成之后,重新软链一下nginx的主程序,就可以投入使用了
ln -snf /usr/local/openresty/nginx/sbin/nginx /usr/sbin/
以上就是大致的安装教程,欢迎讨论!
Centos7编译安装OpenResty
http://localhost:8061/archives/openresty-install